Network
Info
This integration allows for notifications from the local Notifiarr client app to monitor network machines or services.
Network Overview
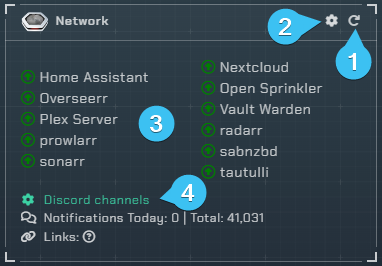
-
Reloads the integration.
-
Opens the integrations settings.
-
A list of everything you are monitoring with the Notifiarr client; shows a green arrow if it is available or a red arrow if it is not.
-
Opens up the Discord channel selection menu.
Integration Settings Menu

Click the cog icon to open the integration settings for the Network integration.
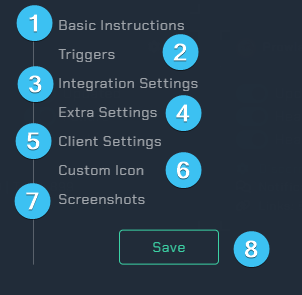
-
Basic Instructions- Gives you basic guidelines on how to setup this integration in the UI. -
Triggers- Adjust which webhooks will send notifications to you. -
Integration Settings- Allows the user to further configure the integration. -
Extra Settings- Adjust the extra settings for this integration. -
Client Settings- Allows the user to set the scanning interval. -
Custom Icon- Assign another icon to notifications from this integration. (Subscriber Feature) -
Screenshots- Shows the expected output once all correctly configured. -
Save- Saves all your Configured settings and closes the Integration Settings Menu.
Basic Instructions
Detailed instructions are shown in the Client UI section of the wiki.
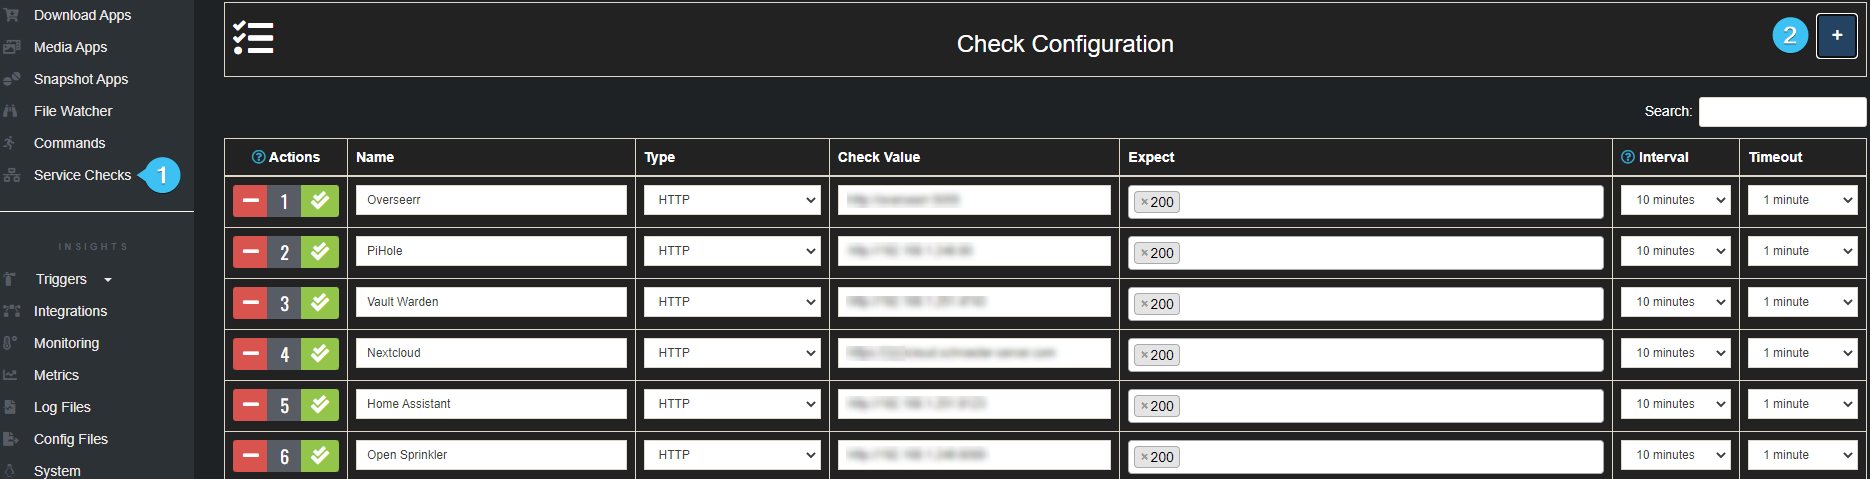
-
Service Checks- Allows the user to configure the destination service and type of check to be done. (Do not add any of your starr applications here) -
+- Adds additional line items.
Integration Settings
These are all the configurable options available to the user.
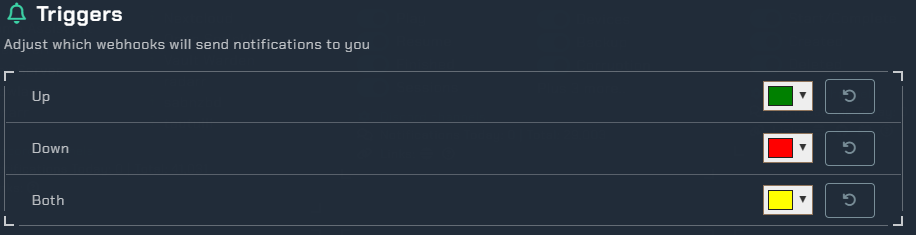
Triggers
Here you can select individual color schemes for each available trigger.
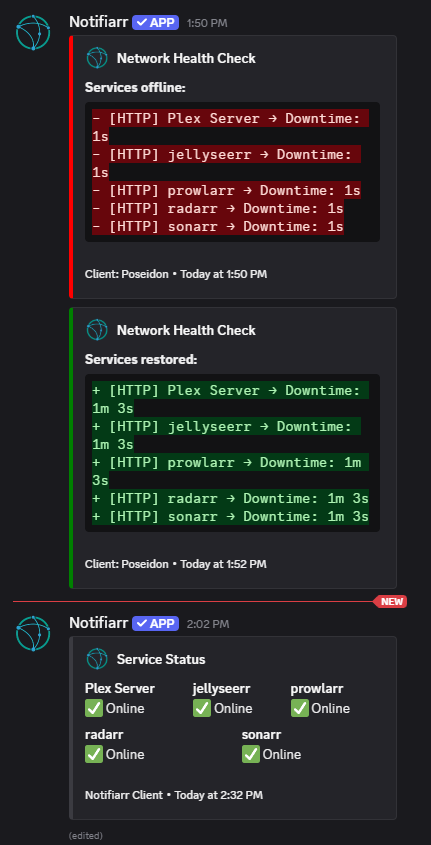
Up- When a monitored service is restored.Down- When a monitored service is unreachable.Both- When a monitored service is restored and another service is unreachable at the same time.
Integration Settings (Monitor Settings)
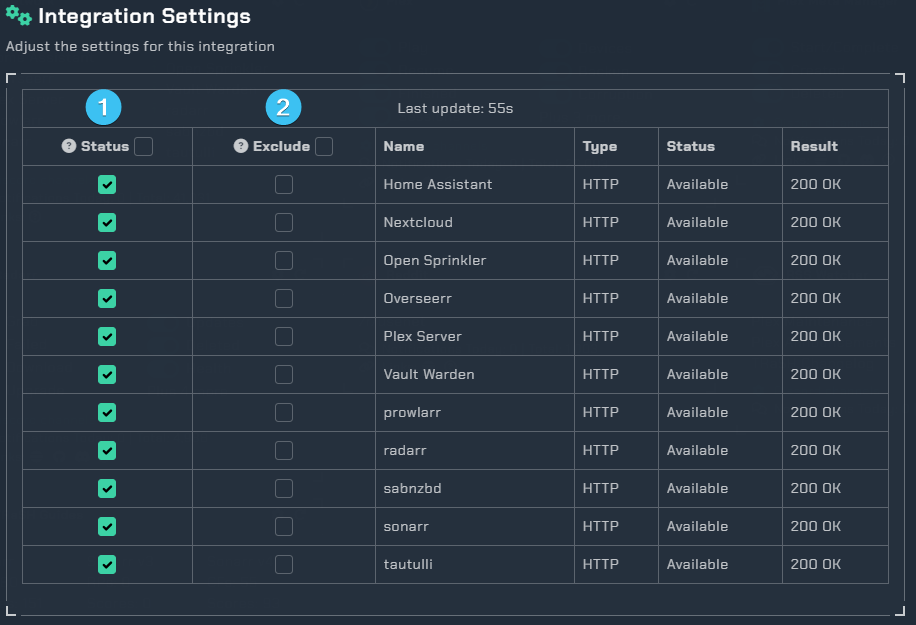
-
Order- This is the order of your services, you can't change this here. You will need to usegroups(this is covered in the next section below). -
Ping- Enable this to ping the selected role when the corresponding service goes into a down status. -
Pick a role- This is where you can pick the role you want to receive the ping. -
Cron- Enabling the cron will post a status message of the currently selected services. (this will follow theService Status (Cron)interval that you set). -
Exclude Notify- This will allow you to exclude the selected services from sending notifications about its status. -
Exclude Status- This will exclude the service from showing on theStatus Page. -
Services- This tells you the name of your services. -
Type- This tells you the type of service such asHTTP. -
Status- This gives the services current status.
Integration Settings (Status page)
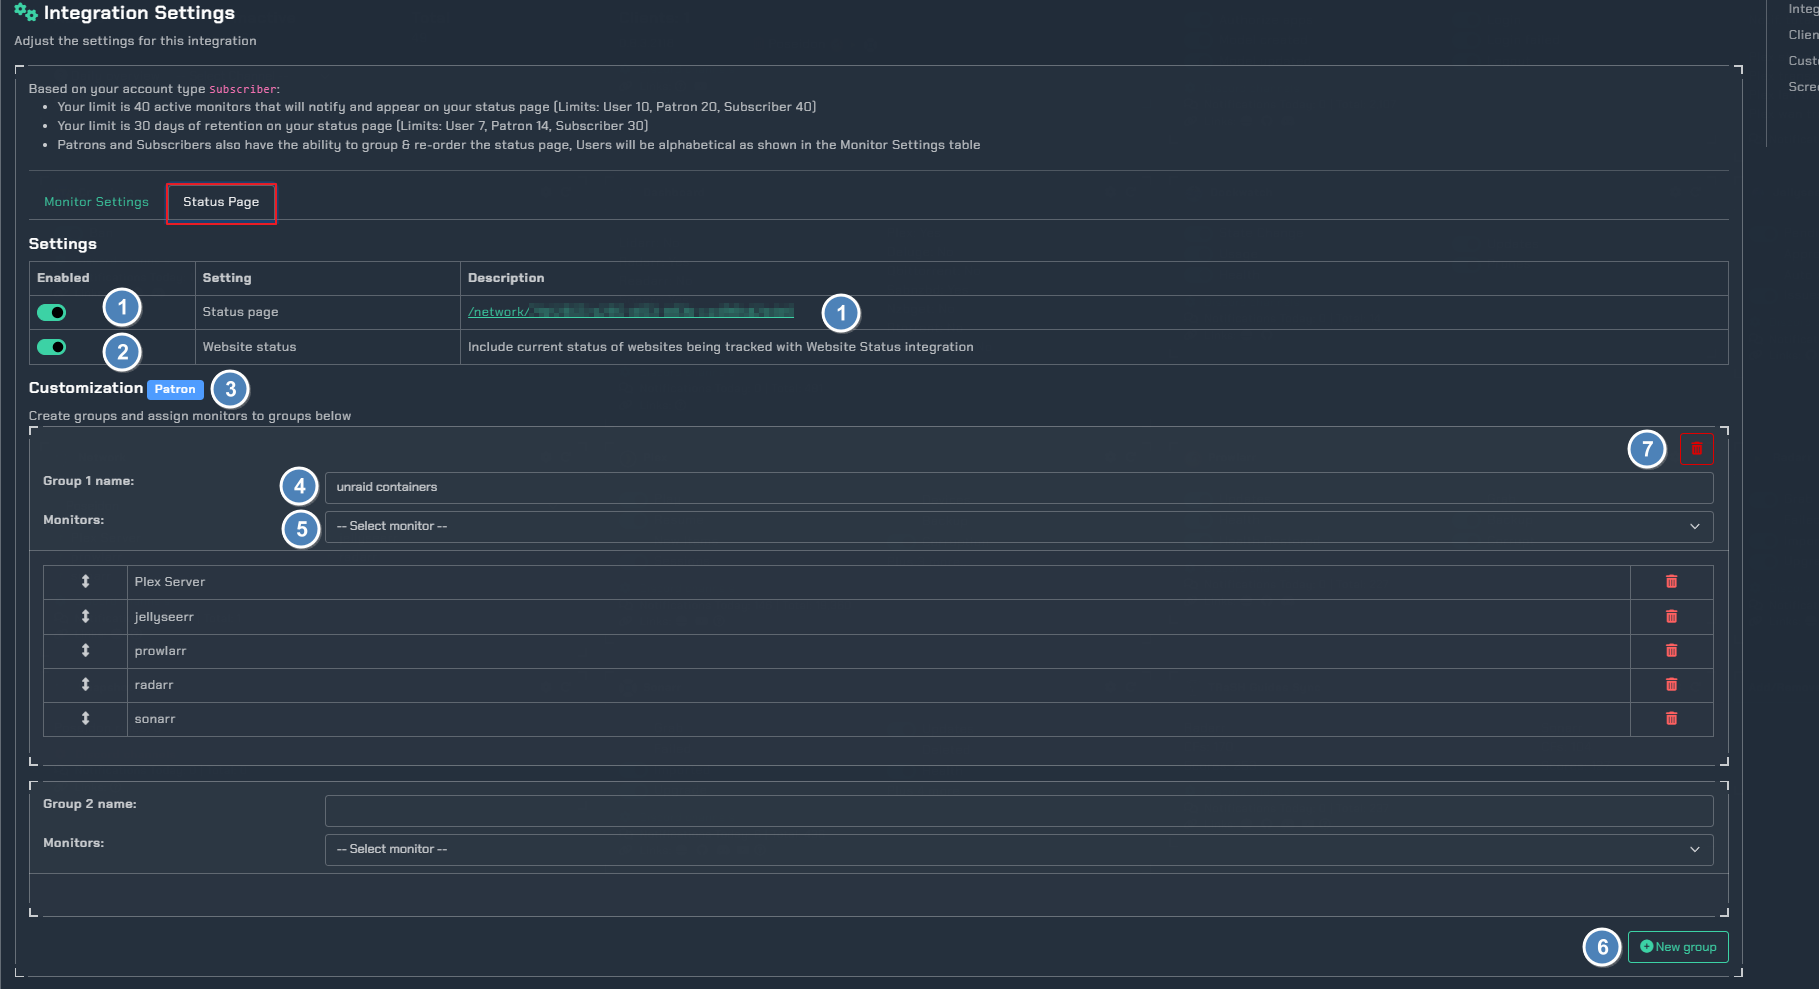
-
Status Page- Enables a web page status overview of all your monitored items. Past events are also shown. (This requires the Status Page API key to be set on the Network integration) -
Website Status- Include current status of websites being tracked with the Website Status integration. -
Customization (Patron Feature)- Patrons/Subscribers can use this area to create service groups. -
Group name- Here you can set the desired group name. -
Monitors- Choose the services you want in the group. -
New group- Here you can create another group, so for example if i wanted a group for all my download clients calleddownload_clientsand another group for myStarr_applicationsthis is how we can achieve this. -
Trash can- This will delete the group.
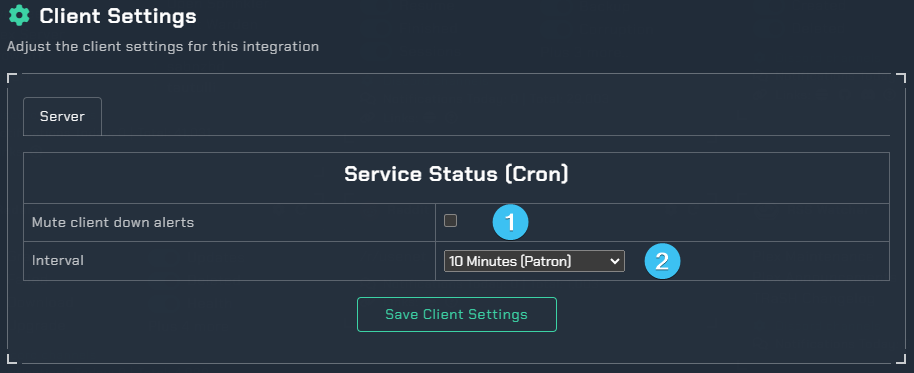
Client Settings
-
Mute Client Down Alerts- Select this to stop down alerts. -
Interval- Select from the drop down list to select the check time in minutes. Or to disable all checks. -
Save Client Settings- Make sure to save the client settings. (this is different from the top save button)
Examples