network
Info
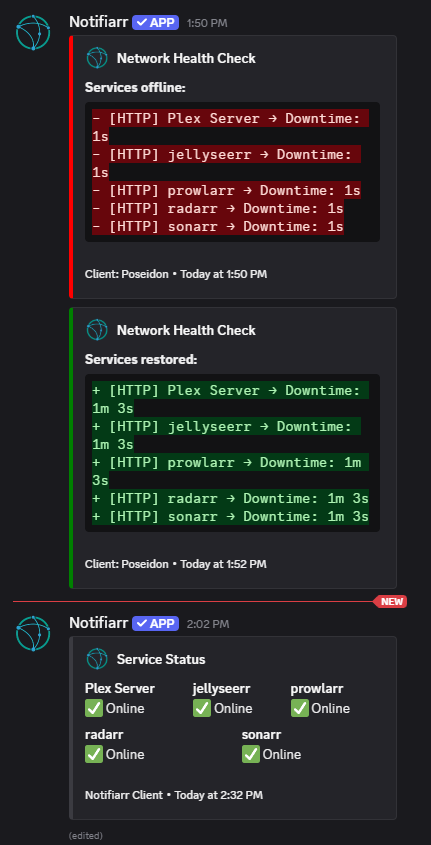
This integration allows for notifications from the local Notifiarr client app to monitor network machines or services.
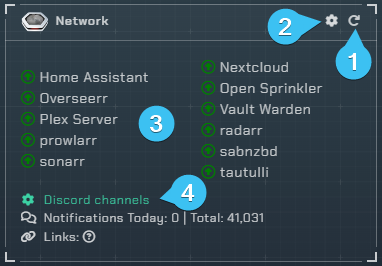
Network Overview
-
Reloads the integration.
-
Opens the integrations settings.
-
A list of everything you are monitoring with the Notifiarr client and show a green arrow if it is available or red arrow if it isn't.
-
Opens up the Discord channel selection menu.
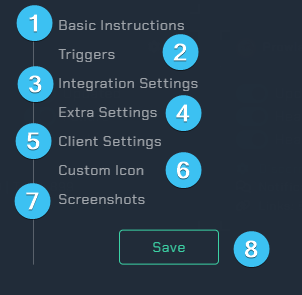
Integration Settings Menu

Click the cog icon to open the integration settings for the Network integration.
-
Basic Instructions- Gives you basic guidelines on how to setup this integration in the UI. -
Triggers- Adjust which webhooks will send notifications to you. -
Integration Settings- Allows the user to further configure the integration. -
Extra Settings- Adjust the extra settings for this integration. -
Client Settings- Allows the user to set the scanning interval. -
Custom Icon- Assign another icon to notifications from this integration. (Subscriber Feature) -
Screenshots- Shows the expected output once all correctly configured. -
Save- Saves all your Configured settings and closes the Integration Settings Menu.
Basic Instructions
Detailed instructions are shown in the Client UI section of the wiki.
-
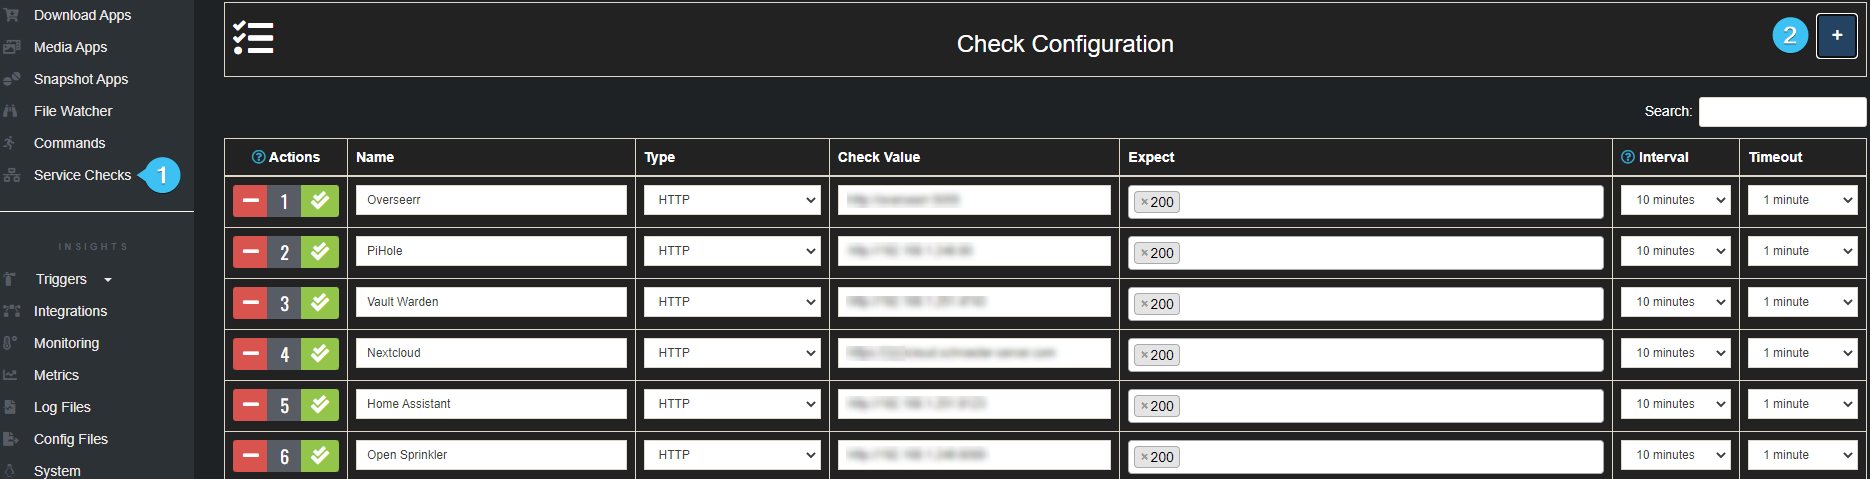
Service Checks- Allows the user to configure the destination service and type of check to be done. (Do not add any of your starr applications here) -
+- Adds additional line items.
Integration Settings
These are all the configurable options available to the user.
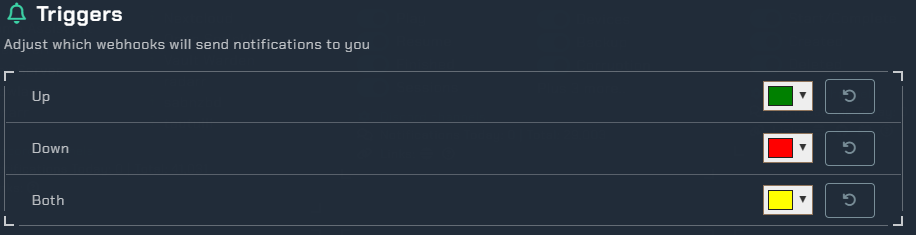
Triggers
Here you can select individual color schemes for each available trigger.
Integration Settings (Monitor Settings)
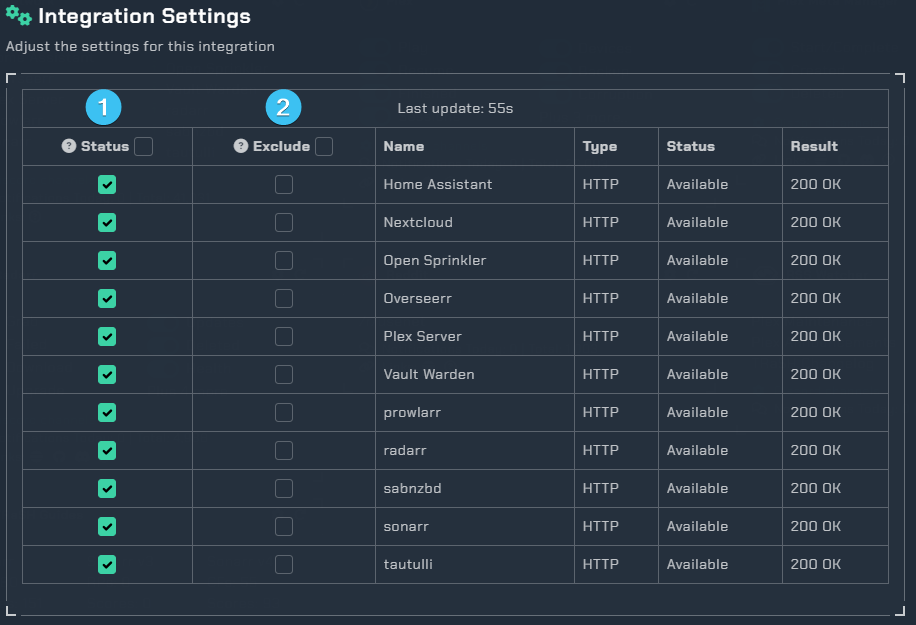
-
Order- This is the order of your services, you can't change this here. You will need to usegroups(this is covered in the next section below). -
Ping- Enable this to ping the selected role when the corresponding service goes into a down status. -
Pick a role- This is where you can pick the role you want to receive the ping. -
Cron- Enabling the cron will post a status message of the currently selected services. (this will follow theService Status (Cron)interval that you set). -
Exclude Notify- This will allow you to exclude the selected services from sending notifications about its status. -
Exclude Status- This will exclude the service from showing on theStatus Page. -
Services- This tells you the name of your services. -
Type- This tells you the type of service such asHTTP. -
Status- This gives the services current status.
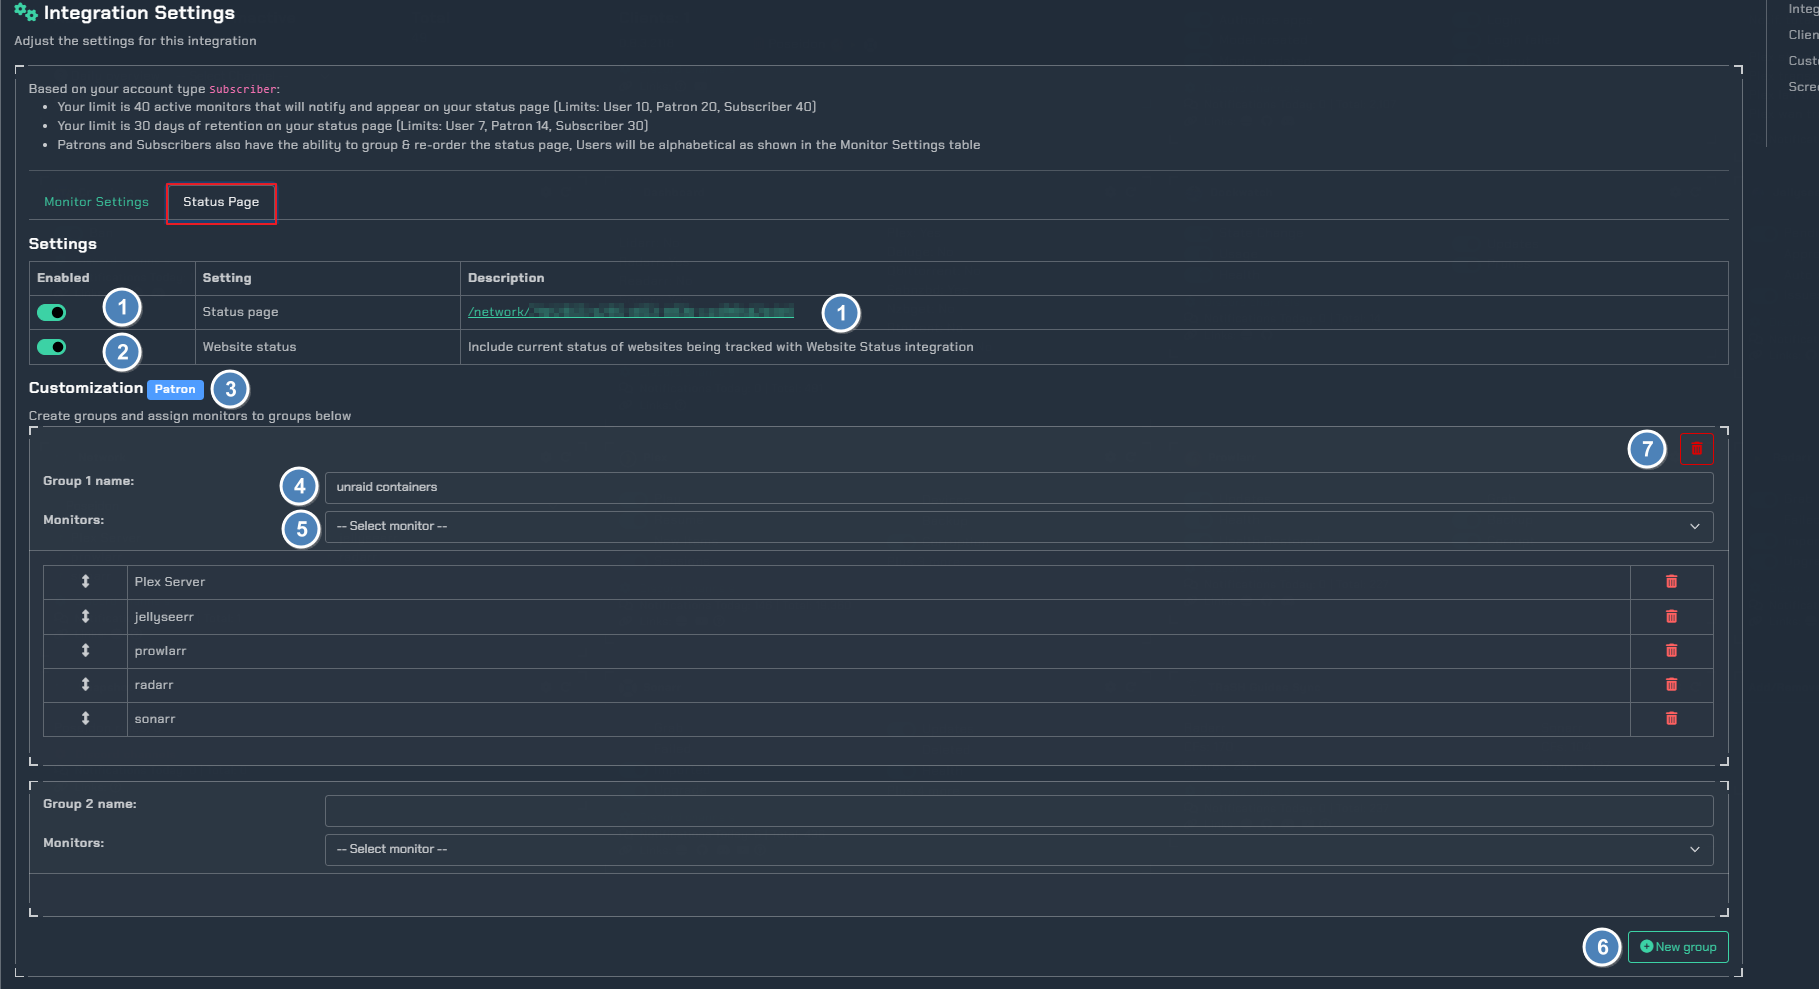
Integration Settings (Status page)
-
Status Page- Enables a web page status overview of all your monitored items. Past events are also shown. (This requires a API set for the network integration) -
Website Status- Include current status of websites being tracked with the Website Status integration. -
Customization (Patron Feature)- Patrons/Subscribers can use this area to create service groups. -
Group name- Here you can set the desired group name. -
Monitors- Choose the services you want in the group. -
New group- Here you can create another group, so for example if i wanted a group for all my download clients calleddownload_clientsand another group for myStarr_applicationsthis is how we can achieve this. -
Trash can- This will delete the group.
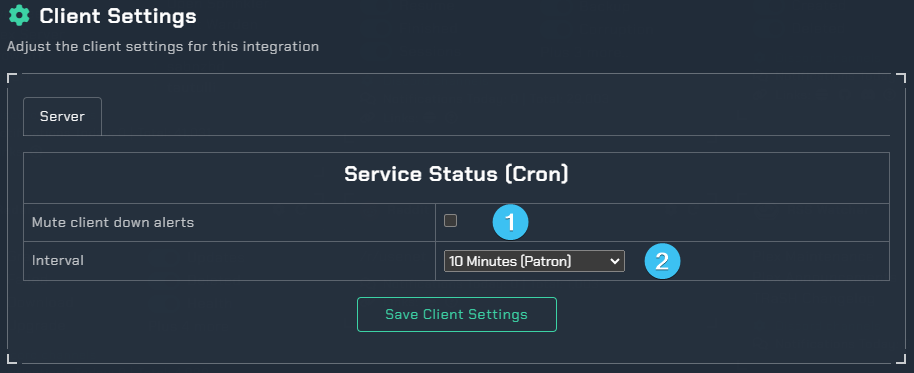
Client Settings
-
Mute Client Down Alerts- Select this to stop down alerts. -
Interval- Select from the drop down list to select the check time in minutes. Or to disable all checks. -
Save Client Settings- Make sure to save the client settings. (this is different from the top save button)
Examples