Jellyfin
Info
This integration allows for notifications from the Jellyfin media app
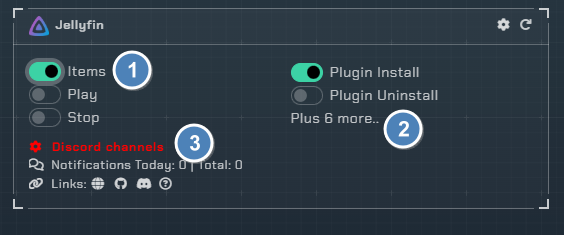
Trigger options
- Triggers
Items- Receive a notification when media is addedPlay- Receive a notification when media has started playingStop- Receive a notification when media has stopped playingPlugin Install- Receive a notification when a plugin has been installedPlugin Uninstall- Receive a notification when a plugin has been removed
- More Triggers
- Open the configuration to enable/disable more triggers
- Channel
- Setup all the channels needed for each trigger
Configuration

Click the cog icon to open the configuration options for Jellyfin.
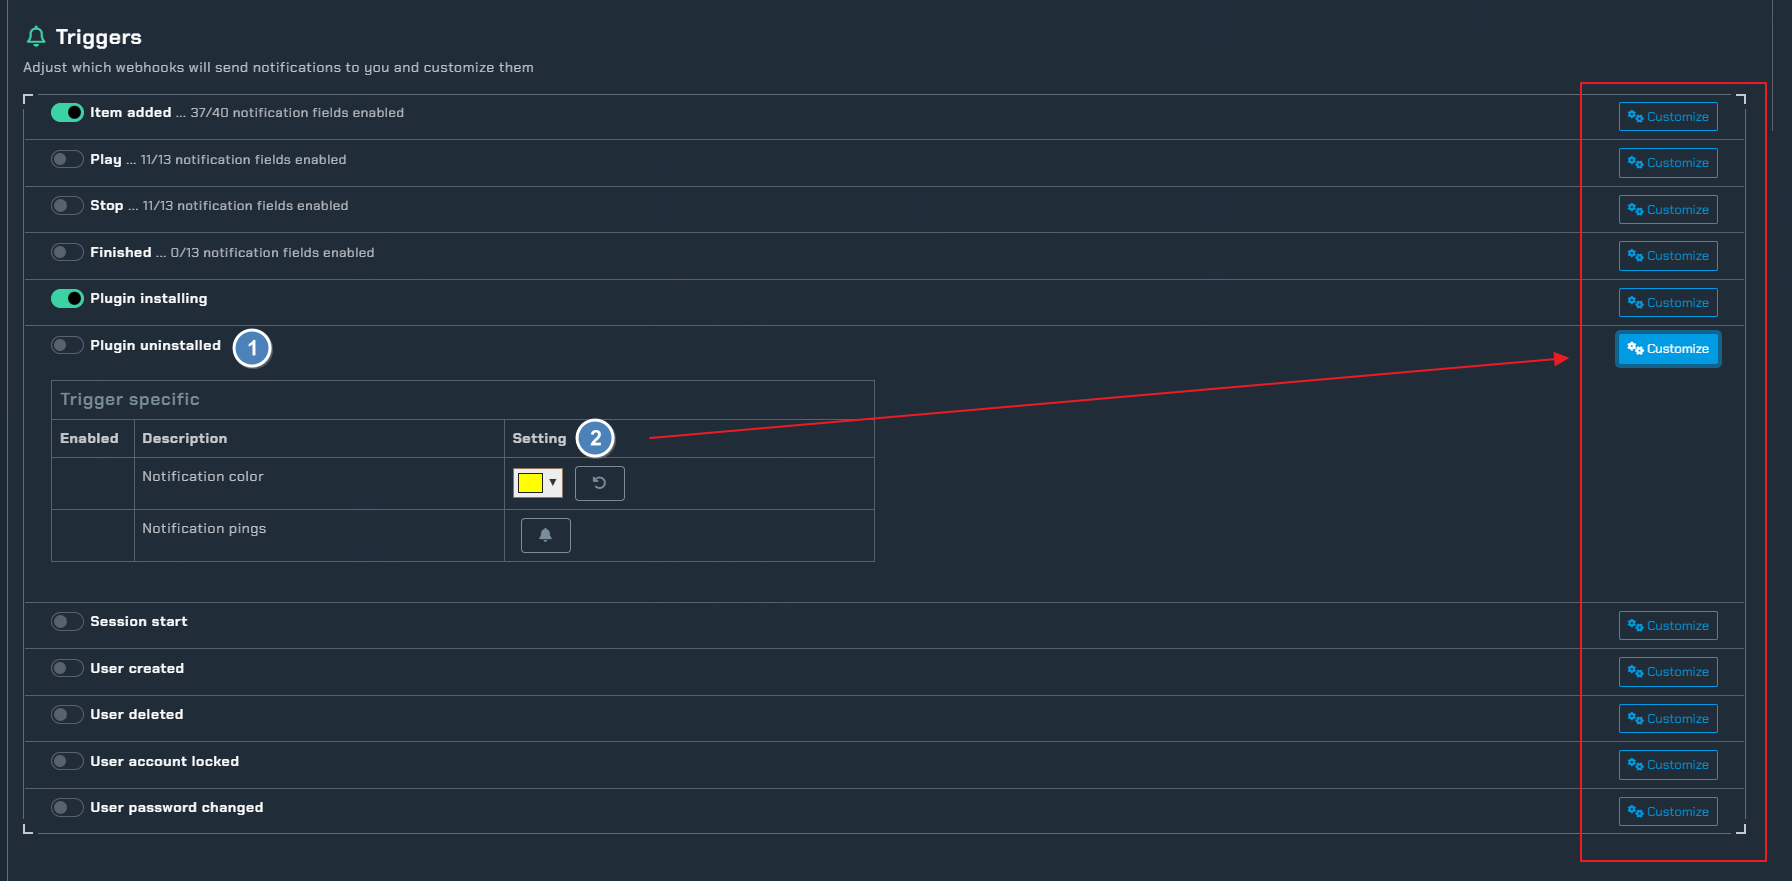
- Enable triggers and pick colors for each trigger
- Expand the notification content settings via the customize button
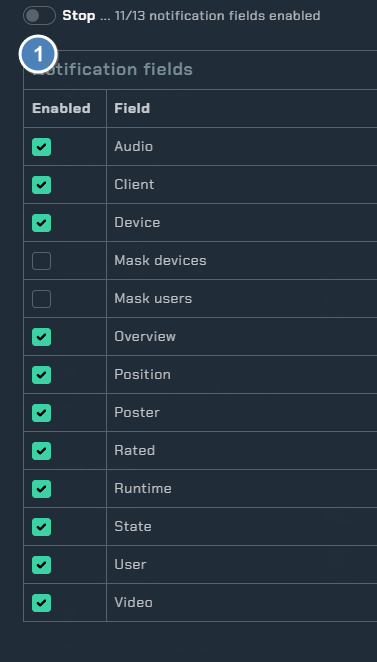
- Notification content options that you can turn on/off to show in the notifications
NOTIFIARR
- This needs to be done in Jellyfin before webhooks can be used
- After the webhook plugin is installed, this is how you add the webhook for Notifiarr
JELLYFIN
To configure your Jellyfin server to work with Notifiarr, we will first have to configure a few things, such as our webhook and notification settings - the latter required to for new content notifications.
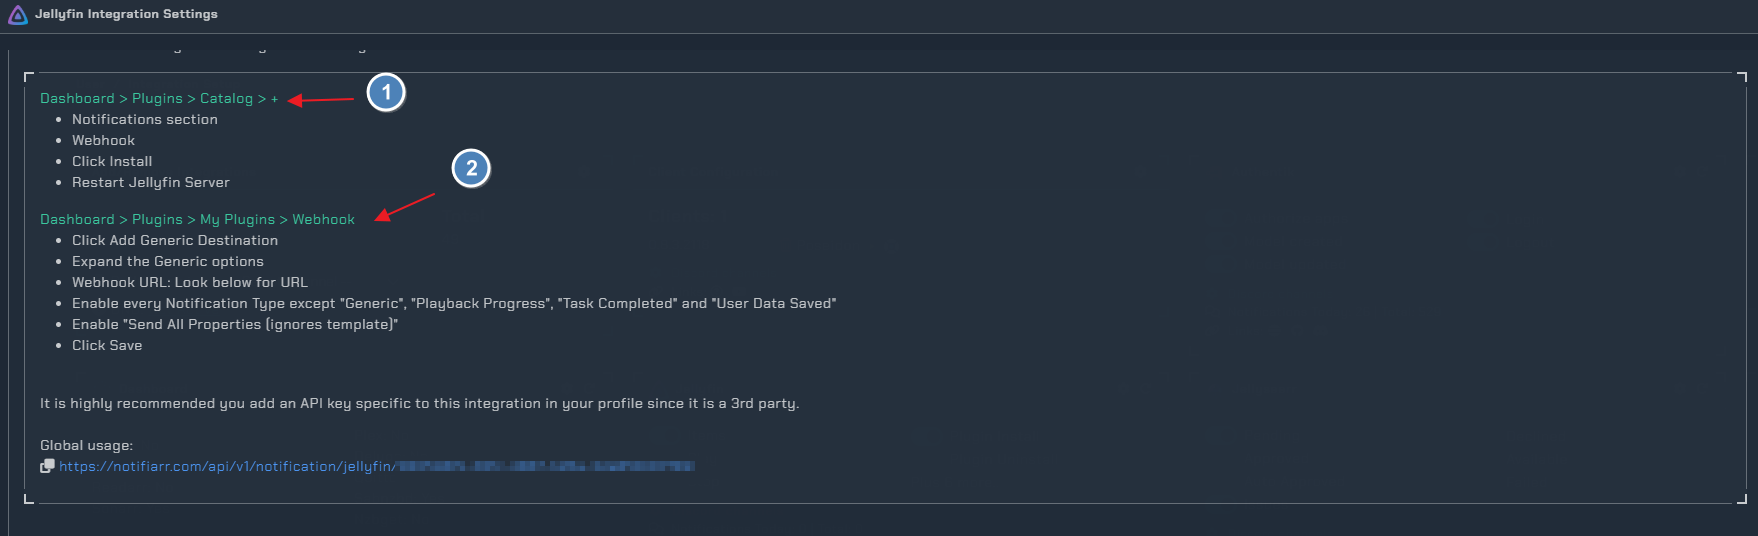
Install the Webhook Plugin
To install the Webhook plugin, navigate to the Dashboard and into the Plugins section.
From here, scroll down until you find the Webhook Plugin
Click on the plugin and install the latest version. Once installed, go ahead and restart your Jellyfin server for the plugin to be loaded.
Configure the Webhook Plugin
Once you have restarted your Jellyfin server, navigate back to your Plugins menu and look for Webhook under the My Plugins tab. Click on it to reveal its options.
Write the URL of your Jellyfin server where it says SERVER URL and click on "Add Generic Destination" and scroll down to configure it.
NAME
Give the Webhook a name
Info
Example: Notifiarr
Webhook Url
Note
This is the URL of your webhook, which includes your API Key
https://notifiarr.com/api/v1/notification/jellyfin/YOUR_API_KEY
Notification Type
Enable all except:
- Generic
- Playback Progress
- Task Completed
- User Data Saved
Check "Send All Properties (ignores template)"
Once the webhook has been configured, remember to click on Save.
Note
If you are using the 'Item Added' notification, be sure to enable it in the notifications settings, otherwise it won't work. Dashboard > Notifications > New content added You can also change how often Jellyfin notifies you of new items by changing the intervals of the scheduled task. Dashboard > Scheduled Tasks > Webhook Item Added Notifier
Debugging Webhooks
Info
If your webhook isn't working, start debugging by adding webhooks to your logging configuration.
Amend your Jellyfin's logging.json file to enable webhook debugging by adding "Jellyfin.Plugin.Webhook": "Debug"
Warning
Remember to add a comma after "System": "Warning" to avoid formatting errors.
{
"Serilog": {
     "MinimumLevel": {
          "Default": "Information",
          "Override": {
               "Microsoft": "Warning",
               "System": "Warning",
+               "Jellyfin.Plugin.Webhook": "Debug"
          }
     }